Chocolate Chip Cookies

Remember that time I started a blog and then ignored it for a few months? Well I am back. It has been a crazy couple of months which included a six week trip to the states, a conference in Czech, and the beginning of summer camp planning. But in honor of Easter (which is this week in Romania) I am sharing my most requested recipe. Any time I am asked to make something for an event or a group meal it is usually these cookies. I have made them so many times over the last two years the recipe is permanently engrained in my brain, I could recite it in my sleep. This weekend I made six dozen for a couple different Easter events. These cookies are so easy to make, and are just about fool proof. They have produced soft and chewy cookies every time, and in my opinion that is the only way to make a cookie.

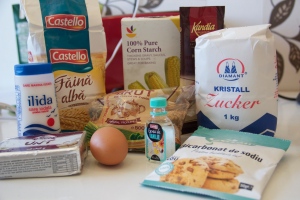
I have found all the ingredients for these cookies except one (I will explain later). Sometimes when I find certain ingredients like soft brown sugar I will buy multiple bags. If I do not have any soft brown sugar then I will use the granular brown sugar. It does not change the taste but the texture is a little different.

The first thing I do it assemble my ingredients. I often get distracted while baking and if I do not lay out the ingredients first I usually forget one. So here is everything you will need for these cookies.

IMG_8683

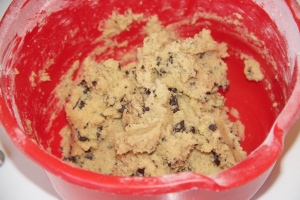
First, I put the butter and sugars into the bowl and mix with an electric mixer. I mix them until they are fluffy and the sugars are well incorporated. Next, I add the egg and vanilla extract and again mix until the egg is well incorporated and fluffy. I then put all the dry ingredients into the bowl and mix until combined. I cannot find chocolate chips here so I use a bar of dark chocolate, chop it into pieces, and add that to the bowl. I mix the chocolate in with a spoon. An electric mixer is to strong and breaks the chocolate into pieces, and I like the chocolate on the chunkier side. When the dough is finished it is stiff, but sticky. You should be able to roll it into a ball, but it will leave dough on your fingers when you are done.

You can stop right now and put the balls of dough into a sealed ziplock bag and freeze the dough and then bake as needed. This way I only bake 6 cookies instead of 36 and I can satisfy my sweet tooth and Brian’s snack attacks!

IMG_8692

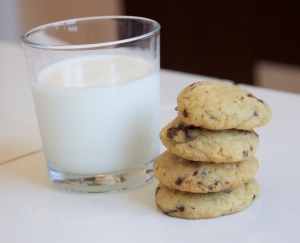
I only bake the cookies for 8 minutes or so. I like my cookies to be soft when they have cooled. If you like crunchier cookies then I would add a minute or two to the baking time. After they are finished baking I let them cool on the tray for a few minutes. Since I like my cookies soft if I try to move them to a cooling rack too soon they will fall through the cracks and make a mess. Once the cookies have cooled they are free game, and often do not last the day.

IMG_8722

Chocolate Chip Cookies
Servings: 3 dozen       Prep Time: 15 minutes      Cook Time: 8 min per batch

Ingredients:
3/4 cup butter (softened)
3/4 cup brown sugar
1/4 cup white sugar
1 egg
1 tsp vanilla extract
2 cups flour
2 tsp corn starch *
1 tsp baking soda
1/2 tsp salt
1 cup chocolate chips

* I cannot find corn starch here (someone sent me some from the states) you can substitute 1 tsp of baking powder, the texture will just be slightly denser.

Directions:

1.  Preheat oven to 350ºF (175ºC) and line two baking sheets with parchment paper.
2.  Mix butter, white sugar and brown sugar in a bowl until light in color and fluffy in texture.
3.  Add the egg and vanilla and mix until the egg is well incorporated.
4.  Add all of the dry ingredients: flour, baking soda, corn starch and salt. Mix until every thing is   incorporated but do not over mix or the cookies will be tough.
5.  Add in the chocolate chips and stir with a spoon until evenly distributed.
6.  Roll the dough into one inch balls and place on the prepared cookies sheets.
7.  Bake for 8 minutes for soft cookies until they turn slightly brown on the edge.
8.  Cool for a few minutes on the baking sheets and then transfer to the cooling rack until completely cool.
9.  Store in an air tight container.
Dinner Rolls

It is Thanksgiving, and our first time hosting the big meal. Brian took charge of the turkey and gravy. I made the mashed potatoes, and rolls. We also invited a few Americans that are living in our town and they rounded out the meal. For being his first time cooking a turkey, Brian did exceptionally well. Maybe he will be a guest blogger and give you all the steps because it was a multi-day adventure.

As a kid the only thing I enjoyed about the Thanksgiving meal was the mashed potatoes, and the rolls. I stomached turkey and whatever vegetable casserole was presented, but the rolls were what I looked forward to. I have made this recipe on many occasions and it is pretty hard to mess up. They have a nice buttery flavor and go great with just about any meal.

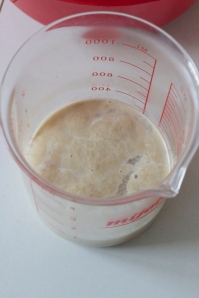
The first step is to scald the milk, butter and sugar. I had to look that up the first time I made these rolls and all that means is put it into the microwave to melt the butter and get the mixture quite hot. Next you need to proof the yeast. I put the water in a glass measuring cup and then added the yeast and sugar and let it sit for a few minutes until it starts to bubble.

yeast

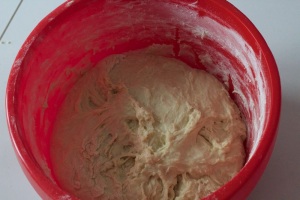
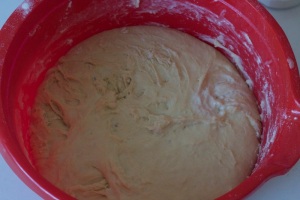
Before adding the yeast mixture to the butter mixture you will want to make sure it is no longer boiling hot. To cool it down, I add two cups of flour, the egg and the salt and mix it together. Then I add the yeast mixture, this prevents the hot butter mixture from killing the yeast. Now you will want to add flour to the mixture until it starts to form a dough. It usually takes about 10 cups, including the first two you added. Once the dough starts to form a ball I usually use my hands to get the last of the flour incorporated. The dough will be slightly sticky but it should be easily shaped into a ball. I will then place the dough in a covered bowl and let it rise in a nice warm place.

  before       after

After the dough has doubled in size it is time to get started. I put oil on the surface I am going to use because then you do not end up with floured look on the rolls. Break the dough into four equal sized balls and roll one ball into a circle. Once the dough is rolled out spread butter all over the top. This makes the rolls taste all buttery and soft.

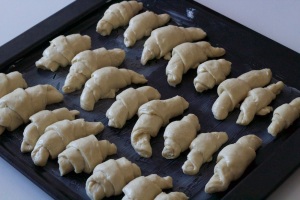
precooked

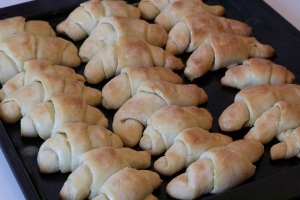
Cut the circle into 12 triangles and roll the dough starting at the fat end. Place the rolled dough onto the buttered cookie sheet. You should be able to fit 24 rolls per sheet. Turn on the oven and preheat to 350 degrees. Place the rolls on top of the oven so they can rise again. Cook the rolls for 10-15 minutes until they are golden brown. When the rolls are fresh out of the oven run a stick of butter over the top for a nice buttery glaze.

after cooked

Dinner Rolls
Servings: 48 rolls      Prep Time: 2 hours      Cook Time: 12 min per batch

Ingredients:
1 1/2 cups of milk
3/4 cup of sugar + 1Tbs sugar
1 egg
1 Tbs salt
2 Tbs yeast
9-10 cups of flour
at least 1 cup of butter

Directions:

  1. Scald milk, 3/4 cup of sugar and 1/2 cup of butter in a microwave safe bowl for about 2 min. Cut the butter into chunks to melt faster. There might be small cubes of butter left, they will melt.
  2. While the mixture is cooking, add yeast to warm water and sugar. let it sit for a few minutes until it is bubbly.
  3. To cool the butter mixture add 2 cups of flour then add the egg and salt. Leave it to cool for a few minutes.
  4. Make sure your butter mixture is just warm and then add the yeast mixture.
  5. Using a wooden spoon slowly add the remaining flour. I add 2 cups of flour at a time and use a wooden spoon to stir in-between.
  6. At the end the dough will be dense and sticky. you can use your hands to incorporate the remaining flour. Then smooth the dough and cover the bowl with plastic wrap. Leave it in a warm place to rise.
  7. Let your dough double in size. While the dough is rising butter 2 cookies sheets.
  8. Cover your work space with oil or flour to prevent dough from sticking. Dump out your dough and split into four equal sized balls.
  9. Using one ball at a time roll the dough into a circle. Once it is rolled out spread the top with butter. Use about 2 Tbs per circle of dough.
  10. Cut the dough into quarters. Then cut each quarter into thirds so you have 12 triangles.
  11. Roll each triangle starting with the fat end.
  12. Place the rolled dough onto the buttered cookie sheet. You should be able to fit 24 rolls per sheet.
  13. Pre-heat the over to 350 degree and place the pan of rolls on top of the oven to rise again.
  14. Once the rolls are touching cook them in the oven until golden brown about 10-15min.
  15. While they are still hot and fresh out of the oven run a stick of butter over the tops for a buttery glaze.

Oven Baked Fajitas

People often ask what food I miss the most and I think it would be Mexican food. I can only get it if I make it myself. So I found my new go to meal when I am have a craving. It is also the meal I make when people come over for dinner, because chances are they have never had anything like it.

This recipe is so easy, the hardest part is chopping the onion. It can be made even easier by replacing the spice ingredients with a fajita seasoning packet, but since I do not have any of those I make mine from scratch.

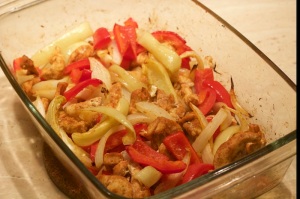
All you do to make the fajitas is chop the peppers and onion to your desired thickness. I like mine smaller because then when you take a bite you do not pull out all the filling. Then you chop the chicken into thin slices. Place the chicken and veggies into a 9×13 pan. Next cover with either the fajita packet or the spices and drizzle the oil over the top. Then mix everything together.

Place the dish into the oven and bake. I stir it at least once to avoid the veggies from sticking to the side of the pan. Once the veggies start to char and the chicken is cooked through your dinner is ready!

fajita pan

The nice thing about these is when they are done you can customize them. You can add jalapeños, avocados, fresh tomatoes, cheese, sour cream, salsa, the choices are endless.

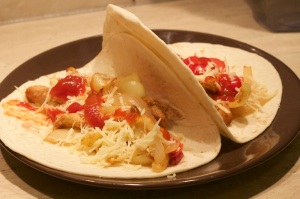
fajita plate

Oven Baked Fajitas
Servings: 8 fajitas      Prep Time: 15 min       Cook Time: 40 min

Ingredients:
Seasoning
1 Tbsp chili powder
½ Tbsp paprika
½ tsp onion powder
¼ tsp garlic powder
¼ tsp cumin
⅛ tsp cayenne pepper
½ tsp salt
½ Tbsp corn starch

Fajitas
2 small (or 1 lg.) onion
2 medium green bell peppers
1 medium red bell pepper
1 lb. chicken breast
2 Tbsp vegetable oil
8 (6-inch) tortillas

Directions:

1. Preheat the oven to 400 degrees. Mix all of the ingredients for the fajita seasoning in a small bowl and set aside (chili   powder, paprika, onion powder, garlic powder, cumin, cayenne pepper, sugar, salt, and corn starch).
2. Cut the onion and bell peppers into your desired size. Place them in a large 9×13 inch casserole dish. Slice the chicken breast into very thin strips and add it to the casserole dish with the vegetables.
3. Sprinkle the seasoning over the meat and vegetables. Drizzle the vegetable oil over everything and then use your hands to toss the ingredients until everything is well coated in oil and seasoning. Bake in the preheated oven for 35-40 minutes, stirring once half way through.
4. Scoop a small amount of meat and vegetables into the center of each tortilla. Top with a whatever toppings sound good (sour cream, guacamole, tomatoes, cheese…,etc)

Chocolate Pumpkin Muffins

As I stated in the last post, canned pumpkin is not available around here so last week I cooked down a pumpkin and ended up with 12 cups of pumpkin puree, so I am experimenting with it any chance I get. Today I combined two of my favorite things pumpkin and chocolate. These little guys could go either way in the muffin, cupcake debate. I labeled them as muffins because I did not put frosting on them. Whatever you decide to call them doesn’t change the fact that they are delicious!

I simplified the original recipe I found and didn’t notice the missing steps. I am finding out that in most recipes the need to use multiple bowls is unnecessary.When you have a very small kitchen and no hot water in the kitchen sink the least amount of bowls used the better.  So on top of being delicious this recipe is also quick and easy.

I started by creaming the butter and sugar together until well mixed and then I added one egg at a time mixing between eggs. Next, I added the pumpkin and vanilla and mixed for quite awhile. My batter was a little weird looking so I kept mixing hoping it would help, it didn’t but I kept going.

After the wet ingredients were well mixed I added the dry ingredients straight into the bowl, no need for dirtying a second bowl. After all the dry ingredients were add I mixed until well combined and then added the chocolate chips and mixed with a spoon.

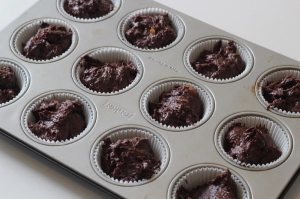
The batter was pretty thick and when I went to fill the muffin cups I pretty much filled the cups completely full. I always hate when recipes says fill 2/3 the way full and I am not really sure what that looks like. So this is how much I put into each tin.

IMG_9860

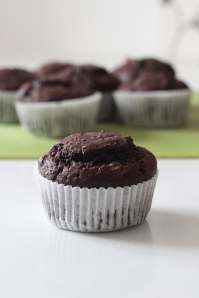
Next I put them into a 350 degree oven (175C) and let them bake for 12 min and rotated them. My oven cooks much faster in the back corner so I have to rotate everything. I let them cook for another 5 min or so. I was crossing my fingers these stayed as nice as when they came out of the oven. Sometimes I pull muffins out and they have a beautiful dome and after they cool they sink. I am pleased to say these stayed domed and look amazing. In the last two days I have made 24 muffins and only 3 remain.

IMG_9870

Chocolate Pumpkin Muffins
Servings: 12 muffins            Prep Time: 15 min             Cook Time: 20min

Ingredients:
1/2 cup of butter
3/4 cup of white sugar
2 eggs
1 tsp vanilla
1 cup of pumpkin puree
1½ cups flour
1 tsp baking soda
1 tsp baking powder
1 tsp cinnamon
½ tsp salt
1/2 cup of unsweetened cocoa powder
1 cup semi-sweet chocolate chips

Directions:
1.  Pre-heat oven to 350 degrees (175 C).
2.  Cream the butter and sugar together until light and fluffy.
3.  Add in the eggs, one at a time, beating thoroughly after each addition.
4.  Add in the pumpkin and vanilla, beat all ingredients until light and airy.
5.  Add all the dry ingredients to the wet ingredients, mix until well incorporated.
6.  Add in the chocolate chips and mix with a spoon until they are spread evenly through the batter.
7.  Fill lined muffin tins to almost full.
8.  Bake at 350 degree for 17-20 minutes, until the muffin tops spring back to the touch or a tester inserted comes out clean.
10.  Cool on racks.

Spiced Pumpkin Scones

What better way to avoid school work than baking? I cannot think of any, so today I baked and baked and then baked some more.

With fall upon us I joined the bandwagon of all things pumpkin. Since canned pumpkin and pumpkin pie spice are not available here this recipe uses homemade pumpkin puree and individual spices, but you can replace them with canned pumpkin and pumpkin pie spice.

For making scones I have found using a food processor is the easiest way to incorporate the butter into the dry ingredients. A kitchen-aide would also work. If you have to you can use two forks and mix and mix and mix.

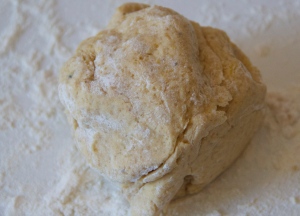
Once the ingredients are nicely mixed and a dough has formed it is time to get your hands dirty. I used a little flour on my table so the dough didn’t stick. I only needed to knead the dough a couple of times because it was already sticking together well.

IMG_9821

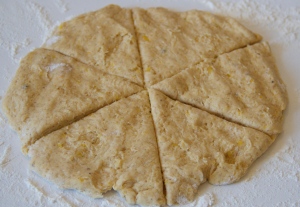
For me, the easiest way to make some what equal scones is to form a circle and cut it into triangles. For this recipe, I split the dough in half and formed two 6in circles. If you like thicker, doughier scones I would cut each circle into 4 pieces. I like my scones a little thinner so I cut each circle into 6 triangles.

IMG_9823

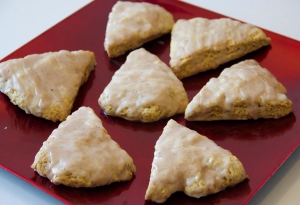
I was able to fit all 12 of my scones onto one pan. They smelled amazing while baking and it was hard to let them cool so I could glaze them before digging in. I tried to make some beautiful drizzle designs with the glazes but they ended up running together. It is hard to tell from the picture but there are two different glazes. If you do not like a sweet scone I would leave off the sweet glaze and just use the spiced one.

IMG_9835

Spiced Pumpkin Scones
Servings: 8-12 scones    Prep Time: 15min    Cook Time: 12min

Ingredients:
Scones
2.5 cups flour
6 Tbs sugar
1 Tbs baking powder
1/4 tsp salt
1/2 tsp cinnamon
1/2 tsp nutmeg
1/4 tsp ground ginger
1/4 tsp ground cloves
1/2 cup butter
1/2 cup pumpkin puree
3 Tbs heavy cream
1 egg
1 tsp vanilla

Sweet Glaze
1 cup powdered sugar
2 Tbs milk

Spiced Glaze
1 cup powdered sugar
2 Tbs milk
1/4 tsp cinnamon
1/4 tsp nutmeg
pinch of ground cloves
pinch of ground ginger

Directions

  1. Put the dry ingredients into a food processor and pulse to combine.
  2. Add the butter and blend until it has a texture like cornmeal.
  3. In a separate bowl mix pumpkin puree, cream, egg and vanilla
  4. Combine wet and dry ingredients in the food processor and mix until a soft dough forms. Do not over mix!
  5. Turn dough out onto a lightly floured surface and knead until it sticks together.
  6. Split the dough in half. With half of the dough form a 6inch circle. Cut the circle into 4-6 triangles, depending on how big you like your scones. Repeat with the other half.
  7. Place the triangles onto a prepared baking sheet and bake 12-14min until slightly browned.
  8. Allow to cool on a wire rack.
  9. While scones are cooling prepare the glazes. To create the glaze slowly add the milk to the dry ingredients.
  10. When the scones are cool spoon the sweet glaze onto the top of each scone. Allow to harden for 10 min. Then drizzle the spice glaze over top.

Chicken Feet and Taquitos

As promised, my first food post. It had the promise of being a doozy. Today, I had the privilege to cook for a group of ladies visiting Medgidia. I received a text last night with the menu. It said, “Please don’t kill me, but tomorrow you have to cook a soup and potatoes with chicken feet and a cabbage salad.” CHICKEN FEET!?! How do you cook chicken feet? And then what do you do with them when you are done, just put them on a plate? After a few clarifying texts I realized the word for foot and leg are the same. I needed to make chicken legs and potatoes. That I could handle!

So the post tonight is not about the baked chicken legs and mashed potatoes but about the dinner I made for Brian and I. Awhile back I found a recipe for fried taquitos, but I never had the correct ingredients. So tonight, I decided to make up my own, and if I do say so myself, they are quite good.

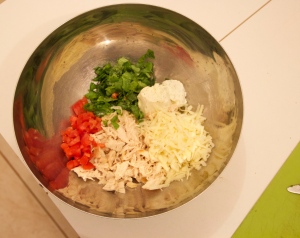
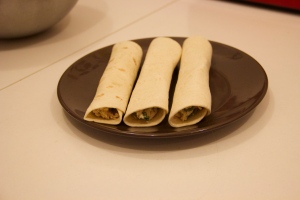
These little guys are no where near healthy, but they were delicious. They are stuffed with shredded chicken, cream cheese, shredded cheese and spinach (their one redeeming quality). I placed all the ingredients in a bowl, and mixed until everything was well incorporated.

IMG_9792

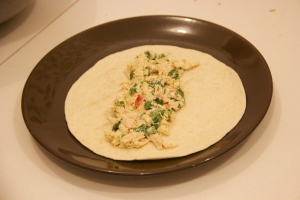
We only have one size of tortilla so these can get kind of chubby. If I had the choice, I would use the smallest tortilla I could find. I put a healthy dose of filling in the center of each tortilla and then rolled them tight. I placed them seam side down on a plate and made as many taquitos as the filling allowed.

IMG_9795     IMG_9805

Next, the fun part. Frying. I used sunflower oil because that it what I had access to. I am still new to frying, so mine weren’t completely uniform but I try to fry each taquito until it is golden brown on all sides.

After they are done we topped ours with homemade guacamole, but sour cream or salsa would also be good.

**The best thing about these is they are totally customizable. You can change up the cheese, cut out the tomatoes and spices and replace with a cup of salsa, add corn or try flavored cream cheese.

Chubby Chicken and Cheese Taquitos
Servings: about 10 taquitos Prep Time: 15 min Cook Time: 20 min

Ingredients:
3 cups shredded chicken
1 cup chopped spinach
1/2 cup cream cheese
1 cup shredded cheese
1 diced tomato
1 tsp garlic powder
1 tsp onion powder
salt and pepper to taste
10 (6in) tortillas
oil for frying

Directions:

  1. Mix the chicken, spinach, cream cheese, shredded cheese, tomato and spices in a bowl.
  2. Work with one tortilla at a time and add two heaping teaspoons of filling to the center of the tortilla. Spread out the filling in a line and roll the tortilla tightly. Place the filled tortillas seam side down onto a plate, until all tortillas are filled.
  3.  Add enough oil to the bottom of a large skillet or frying pan. Heat the oil over medium heat until hot. Fry the taquitos in batches, turning to brown each side. Place the fried taquitos on a paper towel until done.
  4. Serve and eat with your favorite topping.

Wide World of Blogging

Today I have entered the 21st century, and started a blog. The purpose of this is to help me keep track of recipes I like to make. I often find recipes that look amazing but then realize I do not have access to all of the ingredients. So I adapt, but then the next time I make the recipe I do not remember what I did. The blog will help me organize the adaptions I make. It will also give you a peek into my life here in Romania. People always ask questions about what it is like living in Eastern Europe, so here is my way of giving you a small taste.

The blogs on here will range from awkward situations I get into and how it led to some sort of adventure in the kitchen, to epic Pinterest fails and everything in-between. My first food blog will come in a few days when I kitchen-utensils_725x377-1360106590attempt to make lunch for a team from UK using the menu planned and ingredients bought by Romanians. I am sure there will be some memorable moments coming from that day, so be on the look out!

I hope you will enjoy reading the blog as much as I do creating it.

-Katie